Don't design your own bearings
When designing a machine, it is tempting to make a bearing or bushing that is just the right size or material for your application. In almost every case, you should not design your own bearing or bushing. Very experienced companies have spent billions of dollars figuring out how to make the most reliable and low friction bearings possible. Rely on that experience and manufacturing capability wherever possible. This applies to both linear and rotary bearings.
Another way to word this is "Use the best bearing you can for your application". Cost or size constraints might mean that a bronze bushing is the best bearing for a given design, but that's still better than a 3D print sliding on another 3D print.
Don't worry about keeping it simple
Often times simpler designs work better, are cheaper to make, and are easier to maintain. However coming up with simple designs is very difficult. A complex design that works is better than one hundred simple designs that don't work. Making things simpler should usually be a long-term design goal, but it is often counterproductive to consider it as a short-term goal.
A perfect example is this screw elevator design. It seems so simple that someone should've invented it 200 years ago. But they didn't, because coming up with a simple design that works is difficult. https://www.youtube.com/watch?v=-fu03F-Iah8
If you do want to make things simpler and follow the "KISS" approach, I think the best way to think about it is a quote from Einstein: "Everything should be made as simple as possible, but not simpler." It is too easy to compromise on requirements and features in search of some esoteric simplicity.
Move fast and break things (prototype)
From the outside, prototyping can seem like a waste of time and money. Prototypes are often complete failures that barely represent the final product. However this is the key feature of prototypes. They help you identify issues and failure modes that you didn't think about. Often times the failure mode that occurs in the prototype won't occur in the final product (due to material changes, manufacturing differences, etc), but it will get you thinking about failure modes you hadn't considered.
You don't know what you don't know, and prototypes help you find out some of what you don't know. The faster you put together a prototype that accomplishes some quanta of functionality, the faster you will identify issues. You very quickly run into an analytical limit just staring at CAD, so moving into the real world quickly is critical.
Prototyping is most useful when you approach it from a scientific perspective. In other words, have a specific question you want to answer, a hypothesis of what you think the answer will be, and a rough plan for how to get to an answer. This is how most corporate prototyping is structured, since it has a plan. People like plans. The problem is that you don't always have enough knowledge to know what question to ask. If you don't have a question, then you can't develop a plan. This is where exploratory prototyping comes in. Often times prototyping without a question and without a plan will be a waste of time. That's totally OK. The benefit from the times where you do learn something useful will offset the wasted time in the long run.

Prototyping is fundamentally wasteful and expensive
I have to remind myself of this fact for every personal project I work on. It's easy to optimize for cost too early in the process. At the same time, it's easy to spend way to much money on things that don't improve the project. Finding that balance on a budget is incredibly difficult and can be a big impediment to progress. The tip here is just to remember that the goal of making a project is not to save money. The goal is to make something.
Use your entire toolbox
It is easy to see a problem and immediately try to optimize it for a subset of your toolbox. What do I mean by toolbox? Your toolbox could mean what manufacturing technologies you choose, it could mean which suppliers you source from, or it could just mean what materials you try to make something out of.
There are myriad examples, but the most common lately is people trying to make everything 3D printed. Sure 3D printing is neat, but it isn't the best solution for most problems. Another example is trying to make everything out of carbon fiber. Carbon fiber is an incredible material, but it is also a massive pain. CF is not black aluminum. The design-side complexity of using CF usually makes it a poor solution, especially for version 1 of the project.
Surf through McMaster
The fastest way to get to a solution is to look at how other people have solved similar problems. I find that the best source for solutions is McMaster. I have probably looked at every single product in the McMaster catalog, because all of them exist for a reason. Learning why a component exists and why people use it will give you insight into thousands of new solutions to possible problems. Misumi and other websites are also a great way to learn about new components, however McMaster is the best place to start since it is so well organized.An example of what you can learn is in the linear bearings section:
There are 3,512 products in the linear bearings section. To a beginning mechanical engineer, this might seem absurd. If you've only ever seen linear bushings, then you would assume there would be a product for every diameter of bushing, so maybe a few hundred at the most. But, in fact, this section doesn't even include most of the linear bushings! Instead it includes a large variety of linear ball bearings. The purpose of a linear ball bearing over a linear bushing is not immediately obvious, and it becomes even less clear when you look at all the different types of linear ball bearings. I won't go into those specific purposes here, but it is an example of how you can learn about the breadth of solutions available at your fingertips in our globalized and commoditized world.
Read catalogs
Component manufacturers often have detailed catalogs that read like a concise and practical textbook. The exact part numbers found in these catalogs will not match other manufacturers, but usually the load ratings and capabilities of similarly sized components are transferable between brands. A guide rail made of stainless steel made by THK, IKO, NB, Hiwin, etc is going to perform very similarly regardless of brand. No-name low-cost components will likely have worse performance over time due to worse tolerances, but they are unlikely to be dramatically worse, so the catalog guidelines are still helpful.
Here are some catalogs I have found useful:
https://www.eichenberger.com/en/products/ball-screw
https://www.thk.com/catalog/?lang=en
https://www.hiwin.us/resources/catalogs/
https://www.ikont.com/brochures/ (Linear motion blue)
Use adhesives
Adhesives (glue and tape) are a great way to attach components together. The world is assembled using adhesives. Many people avoid using adhesives in prototyping for various reasons. Adhesives can be finicky to get right, but once you have a toolbox of options that you know how to use properly, using them can supercharge your prototyping speed. A small dab of glue can replace a dozen fasteners and improve the look and feel of an assembly. Since most adhesives will fail when you apply peel loading to them or when you heat them up, most assemblies can be taken apart after gluing.
Don't rely on small set screws to transmit loads
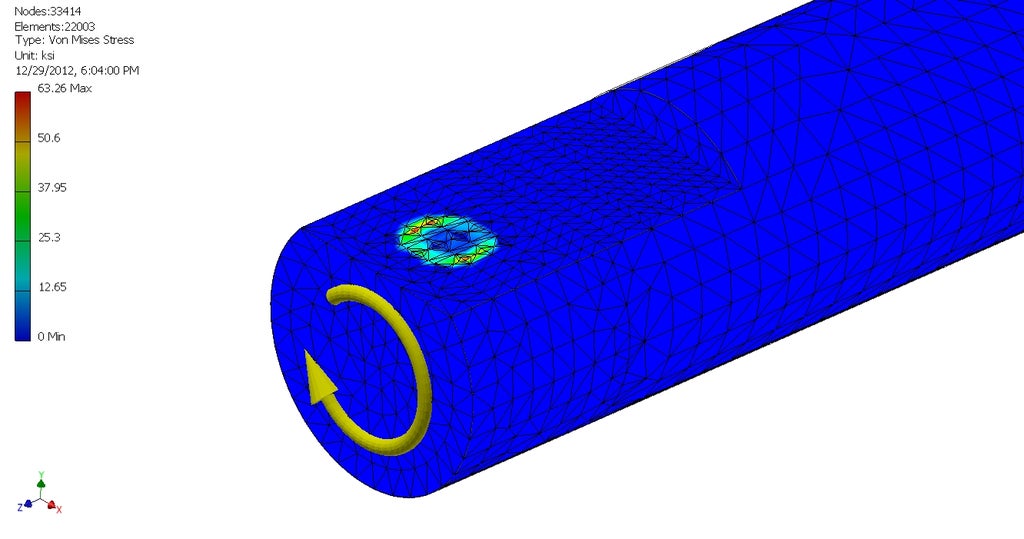
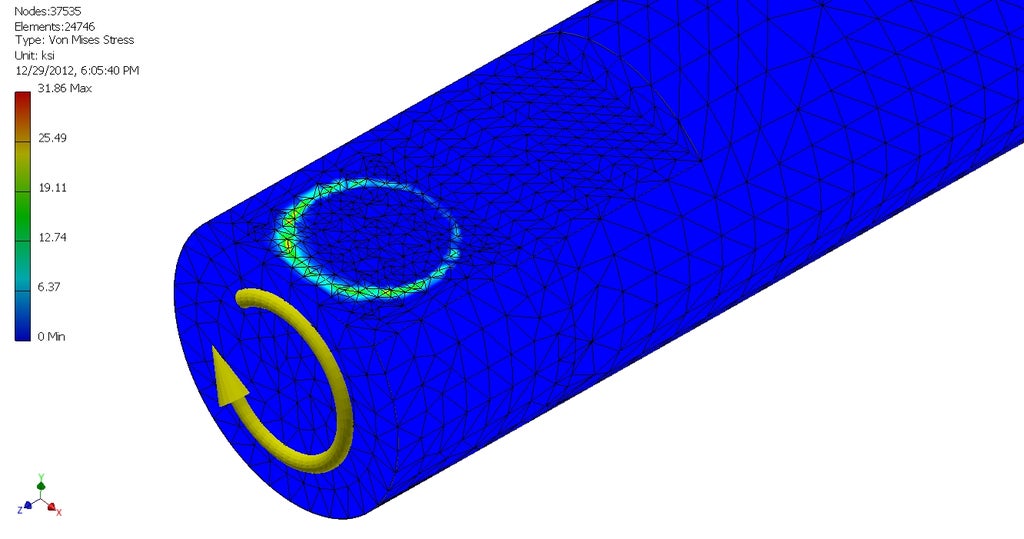
Many off-the-shelf pulleys and gears use set screws to attach to the shaft and transmit loads. This works ok for very low torques, but often results in slippage that damages the shaft. Additionally, set screws are likely to loosen over time due to the oscillating loads usually applied to them.
There are a few better
options. The simplest is just to use a much larger set screw with a flat
on the shaft (a D-shaft). This approximates a D-shaft and D-shaft bore.
Most components with set screws can be drilled out and tapped to accept
a larger screw.


Picture credit: Charles Guan https://www.instructables.com/How-to-Build-your-Everything-Really-Really-Fast/
There are many other good options for shaft connection. Keys, splines, actual D-shafts, pins, clamping collars (of all different designs), and finally glue. Gluing gears or other components to shafts is extremely common. It's a compact and low cost way to get a reliable shaft connection.

No comments:
Post a Comment